Showing posts with label bread. Show all posts

Sunday, June 24, 2012

Skagen-inspired shrimp toasts: A special treat for Swedish Midsummer


In Sweden, Midsummer is celebrated on the Friday and Saturday right after (or during) the summer solstice. It's one of the most important holidays in the Swedish calendar, comparable to Christmas and New Year. It's basically an old heathen tradition that celebrates sun and fertility at a time when the sun doesn't really set and the beauty of a Swedish summer has finally come to full flower after a long, cold winter. It's party time. People head out to parks and raise a Midsummer pole that they've decorated with flowers and dance around it to traditional music. They wear crowns of flowers in their hair. And of course, they eat. (What celebration doesn't include food, right?)
A friend let me share her picture of a typical Midsummer celebration. 
Traditionally, Swedish Midsummer meals consist of pickled herring (I must confess that this is not one of my favorites), new potatoes served with dill and butter or sour cream (yum), strawberries with cream (or better yet, the beautiful little wild strawberries called smultron). And with that of course, you are supposed to drink shots of snaps, while singing drinking songs. (I settled for some really good hard cider instead.) 


For our Midsummer celebration and the last Swedish meal for Sweden week, I modified the traditional meal a bit. For one thing, I have never been able to eat pickled herring with joy and pleasure. I have choked down a piece or two from time to time to be polite, but that's the best I can do. I was able to get some lovely new potatoes from the farmer's market, along with some fragrant dill. Strawberries are over for the season here, but we do have raspberries and blueberries (the queen's berries) at the market, which had to suffice. And grilling a nice piece of meat is always popular for a summer meal. 


But, I did want my family to try something I have loved since I first had it that says "party" to any person who has ever lived in Sweden: Toast Skagen. However, because I didn't have the right kind of roe for the dish (I was able to find some herring roe at IKEA and the right kind of shrimp*), I am hesitant to call this dish Toast Skagen (especially because that is such a fine and elegant dish and my toasts were more "rustic," but not necessarily in the gorgeous way). Instead, I choose to call them simply Skagen-inspired shrimp toasts. They are so easy to make, it's ridiculous. The only work involved is cleaning the shrimp. But they are so delicious, even my five-year old son loved them and ate every last bit. 


Ingredients
  • 1 500-gram bag of frozen northern shrimp, defrosted, peeled, and cleaned 
  • 4 teaspoons herring roe (or any other flavorful, light-colored roe you can find; don't use a black caviar, it will stain and taste too strong)
  • 4 slices light bread, toasted
  • 3-4 tablespoons mayonnaise
  • four thin slices of lemon
  • juice from half a lemon
  • sprigs of dill for garnish
Instructions
  1. Spread mayonnaise on the slices of toast. 
  2. Sprinkle some lemon juice on the mayonnaise. 
  3. Evenly divide the peeled and cleaned shrimp among the toasts. 
  4. Cut each lemon slice through one side of the rind and all way through to the other side without cutting it completely in half. Twist each half of the lemon slice in opposite directions and garnish the shrimp. 
  5. Spoon some herring roe onto the toasts. 
  6. Add a sprig of dill on each toast.
  7. Enjoy!
* A word about shrimp: I don't like most shrimp. I do, however, like the little pink shrimp that you typically get in Scandinavia known as northern shrimp or prawns (their Latin name is Pandalus borealis, which I just had to share after spending quite some time trying to look them up). Compared with most shrimp that I've found here in the United States, they live up to their shrimply name, so cleaning them takes a long time and is fiddly. I still prefer to get them shell and head on, because their texture is weird when they come pre-cleaned. I've only been able to find them frozen at IKEA, which totally ruins any attempts at eating locally, but this is one of those cases where I definitely prefer an imported product over what I can find here.       

Thursday, May 17, 2012

Strawberry-lemonade jam


When you start making your own food from scratch, especially stuff like bread and mayonnaise, you take a whole lot of pride in what you've accomplished. But it wears off. Eventually baking your own bread doesn't feel so special anymore; it's just a regular part of your week. And once you get the hang of making mayo, you kind of feel like, "Hey, no big."


So far I haven't reached that point with making jam. (And I hope I never do.) Here I am, glowing with pride while eight jars of gorgeous jam cool in the kitchen (plus a little extra insufficient to fill a jar). I decided to call it strawberry-lemonade jam because I love strawberry lemonade (and I thought it sounded good), but really it's strawberry jam flavored with lemon zest, lemon juice, and a hint of lemon verbena to cut the sweetness. It's delicious. And I was able to keep the color of the strawberries--a first in jam making for me. So I am a little puffed up. Let me enjoy my moment of glory. Wait, I have to run to the kitchen and get a spoonful from the partial jar...


Man that's good. Sorry, I'm back. That was wonderful. I am going to tell you how to make the deliciousness yourself in a moment, but first a few tips for making jam:

  • Get the very best berries you can find and preferably ones that haven't been sprayed. I got mine from Reid's Orchard because their berries are extraordinarily good, and they practice integrated pest management, which means they rarely spray their fruits.
  • Jam is not an excuse for using less-than-perfect berries. If you've got ugly berries, trim the ugly parts and try making saft (a Swedish fruit syrup that's delicious as a refreshing drink when mixed with water or you could also pour a little over ice cream). Or bake something with them.
  • Get everything ready before you start cooking the jam, because once you start you will not be able to leave the stove for more than a minute or two. (Lot of hovering over the stove involved in making jam.) So that means wash and sterilize all your jars, juice and zest your lemons, wash the verbena stems, place a plate with five metal spoons in the freezer for testing, and have a ladle and a funnel ready to go.
  • Be careful. Making jam is an activity not dissimilar to making candy. That means temperatures get very high, boiling can get violent, and the jam can overflow. Also, it can spatter and burn, so take care. Maybe wear an oven mitt while you stir. Or cast caution to the wind and gain some badges of honor (I got one on my wrist today).  
  • Don't start making jam unless you have at least 45 solid minutes to devote completely to the task. You can't really start and stop, and you have to be present at the stove through nearly the entire cook time.    

OK, so those are the general tips. Here are the specifics (both ingredients and equipment):

  • 4 lbs hulled strawberries (keep them whole unless they are huge)
  • 2 lbs 10 oz sugar 
  • juice from four lemons (between 5 and 6 ounces, divided)*
  • zest from two lemons (finely chopped or grated)
  • 1 large branch of lemon verbena (optional, but nice)
  • 1 white plate with 5 metal spoons, placed in the freezer to prep them for testing
  • 1 deep thick-bottomed pot that's from 8 inches in diameter (up to 11 or 12) (if you don't have a jam pan,** a stock pot will work just fine)
  • 1 silicone spatula
  • 1 skimmer, placed in a bowl of cold water
  • 1 ladle
  • 1 wide-mouth funnel (you'll usually find these wherever you find canning supplies)
  • 9 clean 8-ounce jars with banded lids, washed, sterilized, and kept hot
  • Any equipment you are using to process the jars (pot with rack, baking sheet and rack, etc.). For information about processing jams (and any canned good) safely, go to the National Center for Home Food Preservation.      

OK, now that you have assembled everything you need, let's get started:

  1. Combine strawberries, sugar, and half of the lemon juice in a pot. Stirring steadily with the silicone spatula, slowly heat the mass. When the berries release a lot of liquid and the berry-sugar mass becomes more liquid, raise the heat slowly to high and bring the mass to a rolling boil. 
  2. Maintain the berry-sugar mix at a high boil for about 25 minutes, stirring once a minute or so, making sure to scrape the bottom with the spatula. If the mass starts to stick to the bottom, lower the heat a bit. Using a skimmer, skim the scum off the top for the first 10 minutes. As you will be standing here for a while watching the mass boil, you will no doubt notice some changes in the jam: First, it will boil up very high, possibly threatening to boil over. Usually consistent stirring will help keep that from happening, but it doesn't always work. Adjust the heat up and down as you work to maintain a strong boil, while avoiding losing half your jam in a sticky, possibly painful, disaster. 
  3. At about the 25-minute mark, the jam will change color, growing darker and glossier, and production of foam will decrease. (Before this, you will notice the jam feeling thicker and the intensity of the boiling increasing.) Mix in the second half of the lemon juice and the lemon zest. (Take the pot off the heating element when you do this to avoid scorching.) Bring the jam back to a high boil for 5 minutes. 
  4. After the 5 minutes, take the pot off the heat and add the sprig of lemon verbena to let it steep while you test the jam. To test the jam, place a small amount of jam liquid on a frozen spoon and return it to the freezer for 3-4 minutes. When you take the spoon out, feel the bottom of the spoon, it shouldn't feel hot or cold. If that's the case, tip the spoon to let the liquid run. If it runs slowly and sort of gums up a bit, the jam is done. If it runs fast, let the jam cook for another 5 to 10 minutes and test it again. 
  5. If the jam was done on your first try, let the lemon verbena steep for another 5 to 10 minutes. Before you put the jam into the jars, remove the lemon verbena and toss it.
  6. Using the ladle, pour the jam into the sterilized jars, leaving 1/4 inch room at the top of the jar. You will get 7 to 9 8-ounce jars of jam. 
  7. Process the jars as directed. Except maybe one that you set aside to "test" for flavor to make sure it's OK. Make sure to refrigerate any open jars. 
  8. Enjoy it. It should be good for 6 to 8 months if the jars form a proper seal and are kept in a cool, dark place. Make sure to check each jar carefully when you open it. If the seal doesn't pop, or if anything seems off or weird in any way (color, smell, rusty lids, etc.), just get rid of it. Better to lose a jar than to get sick.   
* The basis for this recipe is Rachel Saunders's "Children's Strawberry Jam," from The Blue Chair Jam Cookbook.
** If anyone feels like getting me a jam pan for Christmas, or for any other reason, I would not mind. No really. I wouldn't.

Friday, September 30, 2011

Friday link roundup and a recipe for a savory version of French toast

A fair amount of cooking went on this week even though it didn't seem as though it was going to work out that way. You see, I neglected to go to the farmer's market last Saturday. I was too lazy to go. My son had his little Happy Feet Soccer class in the morning, and I didn't want to miss it again. As a result, I didn't have a whole lot of fresh ingredients to work with. But somehow I managed to pull out a great meat sauce on Monday, come up with a savory version of French toast and serve it with caramelized onions and bacon, and make red beans and rice last night. Tonight's Friday treat? This fondue minus the brandy. With some ice cream for dessert.

I'd love to share the red beans and rice recipe, but it's not there yet. I added too much tomato to the mix, making it too acidic. It was definitely edible, but it just wasn't up to the level of wow-I've-died-and-gone-to-food-heaven I was aiming for. Especially given the amount of time that went into it. And the fact that I used up all the rest of the delicious pickled pork Mike made a few weeks ago. Oh well.

Another disappointment this week was the photos of the savory French toast. Not pretty. Not appetizing. It's getting darker in the evening, so the natural light that makes photos gorgeous is fading, and I don't yet know how to compensate (if anyone has some tips, please share). So I deleted all my toast photos. Here are some photos of a stunning sunset we had a few days ago instead. Some of these look unreal.


Although things didn't work out perfectly on the cooking front this week, I am proud to say we didn't have to resort to picking up dinner from Chipotle (our go-to fast food restaurant because of their efforts to use ingredients that are as sustainable and local as possible). Don't get me wrong, I love their bowls, but it feels good to be the one who creates the food that goes on the table, you know?

I also came across several good articles to share:

  • I read this article about boiled cider from The Washington Post a couple of weeks ago and tried the accompanying recipe. It took all day to reduce the cider, but it was so worth it. I have this delicious syrup that I have been using to sweeten our morning oatmeal, and I also added some to the red beans and rice. It's so sweet and intense; it's like a sunrise explosion of sweet apple in your mouth. I am almost out and plan to make more this weekend. Another plus is that making it gives the house that fall smell of warm cider.
  • Here's a story about a family from Arizona that pledged to buy 100 percent local for an entire year. I come across stories like this from time to time where someone forgoes something entirely for a year or however long, and I have to admit I couldn't do that. I don't want to. I prefer to take a more evolutionary approach path to locavorism and sustainability by replacing, eliminating, or changing one thing at a time. It's what I can do. Still, these stories provide inspiration as well as ideas for what I could do better. 
  • Came across this story about a man who created his own bread starter, from which all his loaves of bread derive. I have tried making sourdough once--it was not a success--but I look forward to trying again some day.
  • On the farming and sustainability front, the Agronomy Journal published results from the first long-term, large-scale study of the economic feasibility of organic farming versus industrial farming. As it happens, organic farming is profitable in the long term. These kinds of results are really starting to break down old arguments that industrial methods are the only economically viable methods. Think about these results in combination with the United Nations' study's findings Civil Eats reports that indicate organic farming is a viable method for feeding everyone on the planet, and toxic status-quo industrial methods start to look increasingly out of touch.
  • Having grown up in Sweden where the potato is nearly as fundamental to the diet as rice is in China, this report from Marcus Samuelsson's website that the USDA plans to take potatoes off the menu just  pissed me off. Writer Dylan Rodgers was none too pleased either and explains the importance of the potato throughout history. 
  • In contrast, this story about the pawpaw from NPR made me very happy. The pawpaw is a native fruit. Mike and I hunted for them last year to try them, but we were too late. We found a location with a whole bunch of pawpaw trees, but most were down by the time we saw them. I am just excited that someone is paying attention to a homegrown fruit. Wonder if a wander in the woods is in the cards for me? 
So that's the article round-up for this week. And here's that recipe for a savory version of French toast I promised:
  • 8 slices bread
  • 1 cup half and half or cream 
  • 4 eggs
  • 1/2 cup grated cheese (Cheddar or Parmigiano Reggiano)
  • 1 tsp salt
  • 1/8 tsp ground pepper
  • 1/4 tsp smoked paprika
  • 1/2 tsp dried thyme
  • butter (for the skillet)
  1. Place bread slices in a glass baking pan
  2. Whisk together half and half, eggs, cheese, salt, pepper, paprika, and thyme. Pour the mixture over the bread in the pan. Let it sit for at least 10 minutes, but you can also start it the night before. (Flip the bread slices at least once to make sure both sides get a good soaking.) 
  3. When ready to cook, take the bread slices out of the baking pan and let them dry off for a few minutes on a baking rack while you melt some butter in a skillet over medium heat. 
  4. When the butter starts to sizzle and brown a little, place two slices in the pan. Let each side cook until golden brown (about 2-3 minutes) and remove from the heat (keep them warm in an oven heated to 275 degrees Fahrenheit while you do the next batches). Start each batch with a new pat of butter or else they will stick to the pan a lot. 
  5. Serve with caramelized onions and bacon (if you like). You can also add a tiny drizzle of the apple syrup I talked about up above. It's mighty good and makes a nice, simple breakfast for dinner.   


Wednesday, June 29, 2011

Overcoming fear: Lessons from the kitchen

I read an article about the trendiness of using foam in food this morning. What popped out at me was writer Andreas Viestad's shock at hearing comments about making his own whipped cream during a promotional tour a few years' back. He quotes a television host proudly saying, "Did you really whip the cream yourself? Well, my grandmother did that, too!"

As a fellow Scandinavian, I fully understand his amazement at such surprise. I encounter it too: People who speak of bread-making in hushed and reverent tones, as though the skill were some esoteric, magical knowledge bestowed in dark temples by the High Priest of Yeast and the Demiurges of Flour. Or people who are terrified at the thought of cooking a turkey for Thanksgiving, when getting the chance to cook something that big and impressive is so much fun! I can quickly think of a half-dozen items that are easy to make from scratch that many seem to be unable to accomplish without a ready-made product from the store, such as pancakes, biscuits, vinaigrette, marinade, stock, gravy, cookies, etc. Cooking is not rocket science, and yet many seem to approach it with the fear I reserve for trying to do calculus or talking to people on the phone.

Thankfully, I have never been afraid of cooking. Its familiarity to me and the long line of successes that I have had overcome the occasional disaster. But I have other fears and weaknesses. I have messes around the house that I strategically avoid including in the food photographs. I frequently cringe at things I have written. At times, picking up the charcoal and the paintbrush is a real struggle: What am I going to make? Will it be any good? Am I just being stupid to even try? Are my ideas pathetic, weak, derivative, shallow? I get anxious about not being as well organized as I'd like to be or struggling with debt. I feel embarrassed when I haul my heavy body out the door to go for a slow, painful run and imagine how stupid I must look.

In other words, I drag a chain of anxieties, fears, embarrassments, and shames around with me that can make movement difficult, if not downright impossible. I try to rely on little mantras sometimes, like Ted Kennedy's idea of not letting perfection stand in the way of accomplishing something good, or the idea that a long journey starts with a single step, but they don't always work for me.

But here's another idea. I am not afraid of cooking because I am so familiar with it. I have seen it done around me all my life. I have done it myself for years, and I have tried all kinds of things. Know the saying, "Familiarity breeds contempt"? Well, in this circumstance, that's not as bad as it sounds. All that familiarity I have in the kitchen gives me the history to try and fail without too much embarrassment because I know I have succeeded in the past and that I will succeed again soon. All the familiarity and knowledge I have picked up lets me analyze my mistakes and figure out where I went wrong.

So how do I apply this to my fears and anxieties? I breed contempt through practice and familiarity. I try and fail and then I try again. I put embarrassment and fear in a room, and I lock the door. I know they are still there, hooting and hollering away, trying to get out, but I work on ignoring them until they shut up. I drag my floppy belly out the door and run, and I look with empathy at those who run more slowly than I do (and with envy at those who fly by). I make myself write and move on when it's done. I practice drawing, paying little attention to what I draw because I know the ideas will come as I continue to practice. I trick myself into doing the things that scare me or embarrass me or make me feel shame as often as I can with the hope that eventually the shame and fear will go away.

So if you're afraid of cooking, here's what to do. Pick a recipe, any recipe, something you think you might like and try it. Make a mess in the kitchen. If you don't know what something means, look it up. Don't be afraid not to know something and look stupid. The smartest, most talented people in the world got that way because they didn't care if they looked stupid and asked a lot of questions. Maybe your food won't be great the first time, maybe it will. Either way, do it again. Do it until you can do it perfectly and take pride in it. Then try something else and do the same. Build your ability and your familiarity step by step. Know that practice will make you better. And in the meantime, I will try and do the same.        

Friday, May 13, 2011

Baking our daily bread, step by step


When Mike and I started changing the way we eat, the first thing we did was try to eliminate high-fructose corn syrup and everything that sounded like a chemical mystery ingredient. Doing that obviously meant reading ingredient lists at the grocery store. Turns out, getting rid of unpronounceable chemicals is quite hard. This is especially true for bread. Turn those soft packages with their comforting images of farmsteads, grains waving in the winds, and grandma baking over, and you frequently discover a shockingly long list of ingredients that don't sound like they have any relation with the farm, the soil, and the sun. We must have inspected every package of commercial bread until we found one that wasn't too disagreeable, but the implication was clear: I was going to have to bake our bread from now on.

Now thankfully, I was raised in Sweden by a mother who was a great cook and spent a lot of time with an aunt who was an even better cook, so the notion of baking bread wasn't particularly spooky-scary as it often seems to be here in the United States. Bread baking is a matter of course in Sweden; people often seem to speak of it as an arcane art here (in hushed voices), as much out of the realm of typical activities as blacksmithing. Mostly I was concerned with finding/creating a recipe I liked for a regular daily bread that wasn't too much work (obviously it takes a lot of time for the various rises, but you don't have to do much). And I think I have found it and tweaked it to perfection.

So here's my recipe and instructions for baking our everyday bread. It turns out as a soft, golden-y bread that has a beautiful aroma (especially right after it comes out of the oven and you slather some butter all over it). Another nice thing is that it lasts for at least a week (if it lasts that long at all) without becoming stale or moldy. You can also freeze a loaf to use some other time.

I started with Rose Levy Beranbaum's recipe for basic hearth bread from The Bread Bible, messed around with a few different types of flour and some different combinations of flour until I came up with this recipe, which my family and I really like. (By the way, if you've only got bread flour or all purpose flour, you can still make this bread, and it will be really good.) It makes two generous loaves.

Step 1: Make the dough starter or sponge

In a bowl, combine
  • 1 and 1/4 cup bread flour
  • 1 and 1/4 cup wheat flour
  • 1 bare teaspoon dry active yeast
  • 3 teaspoons honey (this is food for the yeast and doesn't sweeten the bread, although I find that using an orange blossom or raspberry honey can add a very subtle but nice aroma)
  • 2 and 2/3 cups of room temperature water
Beat these ingredients together with a whisk until they are smooth (at least two minutes). You want to get as much air in there as you can. When you are done beating, scrape down the sides of the bowl.   


Step 2: Make the flour mixture

In another bowl, mix together
  • 1 cup oat flour (I am convinced this is what keeps the bread soft and creates such a great aroma)
  • 3/4 cups + 2 tablespoons whole wheat flour
  • 1 and 3/4 cups + 2 tablespoons bread flour
  • 1 teaspoon dry active yeast
Cover your dough starter (sponge) with the dry flour mixture, ensuring that all the wet part is covered. Sprinkle 3 teaspoons (or 1 tablespoon) salt over the top of the dry ingredients. 


Cover the bowl with plastic wrap and set it in a warm place to develop flavor for at least an hour and up to four. The dough starter will bubble up through the flour mixture, and that's OK! 


(You can also let it develop flavor overnight if you like. To do this, let the bowl stand out for at least an hour to make sure the yeast wakes up, then pop it into the refrigerator. When you want to start making the bread, let the bowl sit out at room temperature for an hour before you do anything with it so that it warms up enough to get the yeast going again. I find that if I leave it overnight, it doesn't rise quite as much and isn't quite as soft, but it does taste good.)

Step 3: Mix and knead the dough

(OK, if you don't have a decent stand mixer and a dough hook, this step will be tough. Your arms will get quite the workout.) Assemble your bowl on the stand mixer and attach the dough hook. Start the mixer on low speed and slowly raise your bowl up to the hook (this helps avoid flour flying everywhere). Mix slowly until the flour and the dough starter are completely combined. The dough will be a bit sticky at this point, so let it rest for about 20 minutes to develop gluten and absorb the liquid, and then the dough will be easier to work with.

Next turn the dough out onto a floured board and knead it for 10-15 minutes. 

Ha! As it turns out, you don't have to do this. Apparently the rising action of dough will cause it to knead itself, but I still like to let the machine work it over for another three to four minutes before I set it to rise. And supposedly the amount of time that you spent kneading used to be considered a symbol for how much you love your family, so if you feel like proving that, have at it. I knead about half the time; it depends on how much time I have available and how strong I am feeling. 

Step 4: Let it rise, let it rise, let it rise

After you have mixed together the dough, let it rest for 20 minutes, and kneaded it either by machine or by hand, you'll have a nice dough ball. Oil a bowl, put the dough ball in and turn it over a couple of times to get oil all over it, and cover it with plastic. 

    
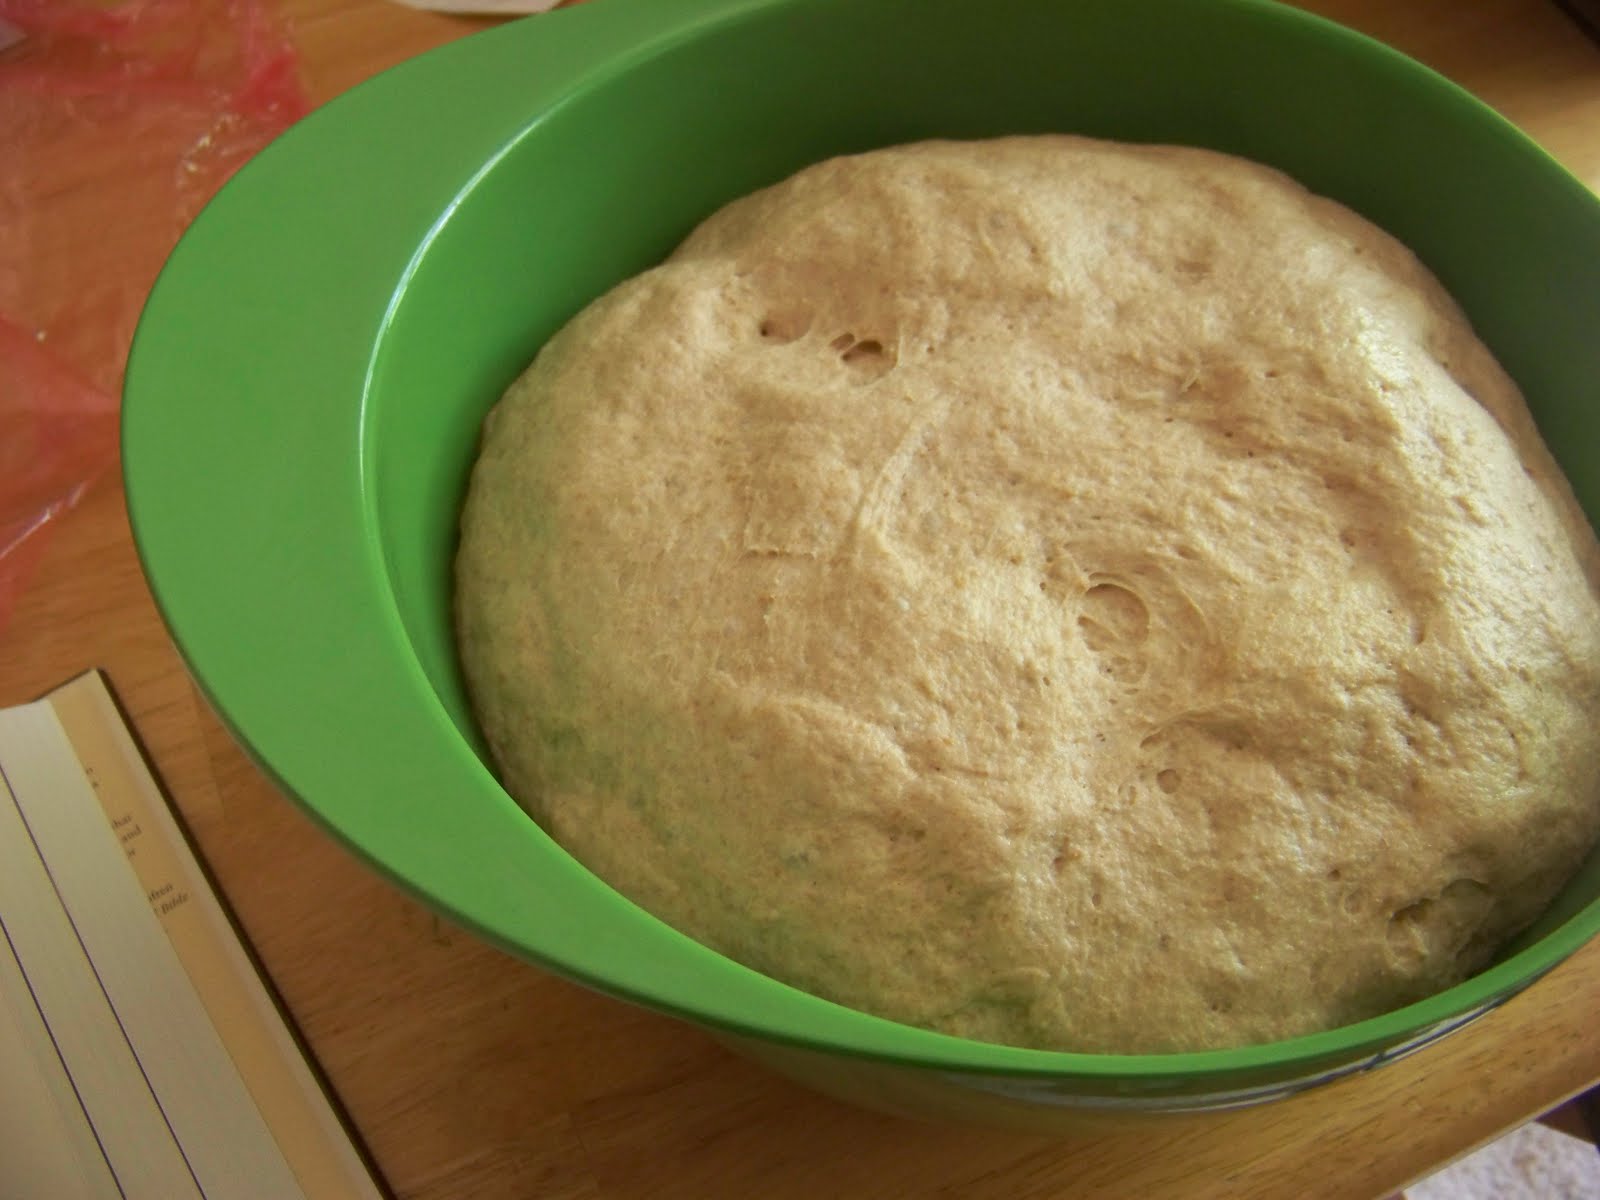
Let it rise in a warm place for about two hours (I find a sunlit window to be a perfect place) until it's about double the size:

Now turn the dough out onto a floured board and flatten it with your hands into kind of a big pancake:


Fold the pancake like you would fold a business letter (three folds). (Beranbaum calls this a "business letter turn.") Then place the seam side down and round in the edges and put it back in the bowl to rise a second time. Once again, let it rise to about twice its original size (the second rise usually takes less time, about 1 hour and 15 minutes). 


Step 5: Shape the loaves and prep the oven
When the dough has risen to twice its size for the second time, it's time to shape the loaves and start prepping the oven. First, turn on your oven to 475 degrees (Fahrenheit). If you happen to have a pizza stone, put it in the oven (that will keep the temperature more consistent). I think you can also use clean bricks. Also put a pan that will hold about two inches of water on the bottom of the oven (just the pan, no water yet).

Then oil your pans (even if they are nonstick). (I use loaf pans that are 23.5 x 13.3 x 6.99 cm. Big loaf pans, basically.) 

Turn your dough out onto your floured board and divide it in half (a dough scraper is kind of genius tool for this, but a big knife will do the trick just fine). Try to make the two halves as even as possible, but I wouldn't worry too much about getting them perfect. 

Then, starting with one ball, flatten and shape the dough into a rectangle.


Fold it like you would a business letter:

Next, roll from the narrow end with the seam on the inside of the roll. Keep stretching it out to the sides until you have a cylinder.

Place the roll into your bread pan with the seam toward the bottom. Do the same thing with the second half of the dough. 


Let the dough rise in the pans until it stands about an inch above the edge of the pan:


Step 6: Bake the bread

When it's time to bake the bread, get about a cup of ice cubes and put them in the pan at the bottom of the oven. (Ha ha, you should hear about the time when I tried doing this with an oven-safe, GLASS pan; It didn't go too well, so don't do that.) Then mist the inside of the oven with a clean spray bottle full of water. Slide the loaves in fast and close the door.

Bake at 475 degree for 10 minutes. 

Reduce the heat to 425 degrees and bake for 20-30 minutes (I usually split the difference and it works well). You will know your bread is done when the edges pull away from the sides of the pan a bit and it sounds hollow when you thump it with your finger.


Step 7: Cool the bread

When the bread is done, take it out of the oven and slide it out of the loaf pans (usually it slides out pretty well, but you may need to go around the edge of the pan with a butter knife). Let the bread cool completely on a baking rack. If it doesn't cool completely before you store it in bags, the steam generated can leave the bread damp and ooky, which will encourage mold.

Now have at it!