Showing posts with label all purpose flour. Show all posts

Sunday, July 15, 2012

A quick pancake mix recipe

A friend of mine asked me for a recommendation for a pancake mix. I don't buy pancake mix because it is truly one of those insanely easy things to do that once you know how to do it, you wonder why the heck you ever bought the stuff in a box full of mystery ingredients.

The pancake mix also makes a nice gift. Last Christmas, I made up a batch of the pancake mix, put it in nice bags with instructions, and gave them to some friends and family with a jar of apple cider syrup and some candied walnuts. They were a big hit!

This recipe comes from Keith Snow's Harvest Eating Cookbook, which has lots of great do-it yourself recipes, including creme fraiche, pasta, sausage, and much more. I also recommend checking out his website, which has tons of recipes, blog posts, and other information about eating seasonally.

Ingredients

  • 1 cup whole wheat flour
  • 1 cup unbleached all-purpose flour
  • 1 cup rye flour
  • 1 cup corn meal
  • 2 Tbsp granulated sugar
  • 2 teaspoons baking powder
  • 1 teaspoon kosher salt
Instructions


  1. Combine all the ingredients in a container and shake it thoroughly. 
  2. To make the pancakes, combine 1 cup pancake mix with 1 1/2 cups milk and 1 egg. (Label your box of mix with these instructions so that you don't have to look it up every time you want to make pancakes.) Pour about 1/4 cup dollops into a hot, buttered pan or griddle and cook them on both sides until they are golden brown.
More suggestions
  • Double or even quadruple the pancake mix and store it in the freezer for whenever you want to make pancakes.
  • Play with the combinations of flours. I like to use oat flour in place of the rye, but there are lots of different flours available. Try them out! 
  • When you make the pancakes, add some some fruit or nuts to the batter. 

Friday, June 29, 2012

Pesto, mozzarella, and cherry tomato pizzas


The time had come to cut back the basil. In the last few weeks, it shot up from the dirt like a shiny green rocket. To avoid blooming (which spoils the flavor of basil), I cut it back hard and ended up with a whole lot of basil on my hands. I made pesto


I also had some nice, sweet little cherry tomatoes from the farmers market, and I needed to make something I could pack for a picnic. I thought about trying to make a tomato tart, but I didn't have a lot of time (and honestly, I have yet to make a pie, so I didn't want to mess up dinner the first time trying it). So I made pizzas. Pesto, mozzarella, and cherry tomato pizzas. And yep, they were as good as they sound. Just sweet tomatoes, cheesy goodness, and a nice crisp crust with a smear of pesto.


Ingredients
FOR THE PIZZA DOUGH*

  • 1 1/2 cups lukewarm water
  • 2 tsps (or 1 envelope) dry yeast 
  • 1/2 cup semolina flour
  • 1 cup whole wheat flour
  • 2 1/2 to 3 cups all purpose flour
  • 1 1/2 tsps salt
  • 2 Tbsps olive oil

FOR THE TOPPINGS


  • 1 cup pesto (approximately)
  • 1 pint cherry tomatoes, sliced
  • 1 lb ball of mozzarella, sliced thinly
  • grated Parmigiano Reggiano
Directions

  1. Mix 1/2 cup of the water with the yeast. Let it stand about 10 minutes. (The yeast should be somewhat foamy. 
  2. Add the rest of the water, the olive oil, the salt, and the flour and mix until the flour is completely incorporated and the dough is slightly sticky. You may need to do this with your hands.
  3. Oil a bowl, place the dough in the bowl. Roll it over a few times so that it's thinly coated with oil. Cover with plastic wrap and let it rise for 45-60 minutes. 
  4. Divide the dough into four equal parts and roll them into balls. Let them rise under plastic for another 30 minutes. 
  5. Preheat the oven to 500 degrees (Fahrenheit).
  6. Flatten the dough balls into thin disks (or if you are using baking sheets, rectangles). Try to make the dough as thin as possible without tearing it. Let the disks or rectangles rest another 15 minutes. 
  7. When it's time to bake the pizzas, spread pesto all over them (as close to the edge as possible).
  8. Distribute the mozzarella slices among the pizzas.
  9. Spread the tomatoes on top of the pizzas. Grate Parmigiano Reggiano over the top of the pizzas. 
  10. Bake them in the oven for 15 minutes. Serve and eat. They can also be eaten when they are lukewarm.    

* Adapted from Deborah Madison's Vegetarian Cooking for Everyone.   

Friday, March 16, 2012

Pizza with caramelized onions, goat cheese, and bacon


It's a shame that this picture is so gloomy, but the last time I made this pizza, it was dark when it came out of the oven and I had to hold back a pack of ravenous, excited beasts (you know who you are, Mike, Sebastian, and David) to get even these moody photos. But let me assure you: This pizza is delicious, by far the best-loved pizza in my household. I think the original idea for this pizza came down from Wolfgang Puck; I am sure it has been bastardized since his original, but the main concept is the same: sweet and slightly bitter caramelized onions balanced against the acidity of the goat cheese and the salt of the bacon. It is a beautiful thing.  


Making the Dough
A good pizza consists of two major parts: the dough and the toppings. Let's start with the dough. Now, I make pizza dough from scratch, but when I first started making this pizza, I would use purchased pizza crusts. Problem with those is that, like many commercial breads, they tend to have a lot of nearly unpronounceable mystery ingredients, so now I make my own dough. It definitely takes more time and a bit more effort, but I think it's worth it. I've found two pizza dough recipes that I like: The one used in this delicious broccoli rabe, potato, and rosemary pizza from Food52, which comes out crispy and beautiful, and Deborah Madison's basic pizza dough from her book Vegetarian Cooking for Everyone, which is also excellent and takes less time but is a bit less crispy. Here are the directions for Deborah Madison's pizza dough:
  • 1 1/2 cups warm water
  • 2 teaspoons (about one packet) dry yeast
  • 2 tablespoons extra virgin olive oil
  • 1 1/2 teaspoons salt
  • 1/2 to 1 cup whole wheat flour
  • 3 to 3 1/2 cups all purpose flour
Note: I sometimes replace 1/4 cup of the all purpose flour with a 1/4 cup semolina flour, which I think make the crust a little crispier, but that's completely optional.

  1. Add the yeast to 1/2 cup of the water and let it stand until it gets foamy (about five to 10 minutes). 
  2. Add the rest of the water, the salt, and the oil to the foamy water.
  3. Then add the whole wheat flour and enough all purpose flour to make a shaggy dough. 
  4. Pour or scrape the dough out onto a floured board or counter and knead until the dough is smooth. Add enough flour to keep the dough from sticking but no more. The dough should be slightly tacky. 
  5. Let the dough rise in a covered, oiled bowl for about 40-60 minutes. (Keep the dough in a somewhat warm place.) 
  6. Turn the dough out on the counter and divide it into the number of pizzas you want (you can make four 10-inch pizzas or two 12- to 14-inch pizzas). Shape the pieces into balls, set them on a lightly floured counter, cover with a slightly damp towel, and let them rise for 20 to 30 minutes. 
  7. About half an hour before you want to put the pizzas in the oven, pre-heat your oven to 500 degrees Fahrenheit and start shaping the dough. Take one ball at a time, flatten it into a disk, and start pushing the dough out toward the edges until you achieve the size you want. It's helpful to have a baking board with diameters. When you have achieved the size, shape, and thickness you want, let the disks rest for 15 minutes before adding any toppings. (The thinner you can get the dough without tearing, the crispier your final product will be.)
Preparing the Toppings
When you make this pizza, start the toppings at about the same time you start the dough. That way, all you will have to do is add the toppings to the pizza disks just before you put them in the oven.

The toppings for this pizza are caramelized onions, crispy bacon, and goat cheese. You will also need some grated Parmigiano Reggiano.
  • 3-4 large yellow onions, thinly sliced (get ready to cry)
  • 4 Tbsps olive oil
  • 8 slices bacon, sliced into 1-inch pieces (or you can just crumble the slices after they have cooked and cooled)
  • 1 8-oz log of soft goat cheese (Chevre), crumbled (do this with a fork in a bowl and you will eliminate a lot of mess)
  • grated Parmigiano Reggiano
  • dried thyme
  • a pinch of red pepper flakes (optional)
The most difficult thing to do here is to caramelize the onions properly. I've seen lots of recipes add salt or sugar to the onions, but you need nothing but time, patience, and olive oil. The onions will produce their own sugar, and they will be delicious.

To caramelize the onions, bring 4 tablespoons of olive oil to medium heat in a large pan with tall sides (you will start off with a large volume of onions that will cook down to a very small amount) and then add the onions. Stir the onions to coat them completely with the oil and then basically leave them alone for up to an hour, stirring perhaps once every five to 10 minutes. Don't worry if they get a little crispy around the edges, but don't let them burn either. They should look like this when you are done:


When they are done, sprinkle in half to a whole teaspoon of dried thyme and a pinch of red pepper flakes if you are using them. Set the onions aside.

For the bacon, just cook it until it's nice and crispy and let it drain on paper towels. Set aside.

Not much to do with the goat cheese except to break it up with a fork. Set it aside.

Now, when it comes time to make the pizza, here's what to do. First, make sure your oven is on (500 degrees, remember?). If you have a pizza stone and a peel, now is a great time to use them. If you don't, line baking sheets with parchment paper and set your pizzas down on them.
  1. Sprinkle grated Parmigiano Reggiano all over the pizza dough. 
  2. Add half (or a quarter, depends on how many pizzas you are making) of the caramelized onions and spread them evenly around the pizza. 
  3. Sprinkle half (or a quarter) of the goat cheese over the onions. 
  4. Sprinkle half (or a quarter) of the crumbled bacon over the goat cheese. 
  5. Grate some more Parmigiano Reggiano over the top and slide the pizza into the oven. Tip: If you are using a peel, rub some corn meal or flour into the peel to prevent sticking.  
  6. After seven minutes, check the pizza. If it's a little golden brown on top, the pizza is done. If not, leave it in for a few more minutes. 
Voila! You've got an amazing pizza. And, you've also got a basic dough recipe so you can experiment with your own pizza toppings. Have fun with that.  

Friday, January 27, 2012

Happy Chocolate Cake Day!


Early this morning I learned today is Chocolate Cake Day. Therefore, I felt duty-bound to bake a chocolate cake and write about it so that you, gentle reader, may have some inspiration and tips for baking your own tasty treat. So this is all for you. Don't say I never did anything for you!


Before I get into the how-to's and why-for's of this cake--as well as the results of a little experiment I ran on cocoa--let me talk a little about cake. Cake is one item I have had a lot of trouble with since transitioning to a mostly local and/or organic and scratch-made diet. In my family, we always bake a cake for one another's birthdays. In years past, that has meant going to the grocery store, getting a box of cake mix and a tub--oh all right, two tubs--of chocolate frosting and making a moist cake with creamy deliciousness smeared all over it. But, with our commitment to avoiding most industrial food, this is no longer an option and so we have to bake our cakes from scratch.


And it turns out a lot of science, technique, and finesse goes into baking a good cake; thus, much trial and error ensued. I've made a few disasters: flat, dense, dry bricks with hard frosting crusting the top. Not good. (Not that my little boy minded: sweet is sweet as far as he's concerned.) I tried changing the flour I used to cake flour, still not getting the result I wanted. (And it was a big mistake, I think cake flours are really only for very light and airy cakes, like angel food cake.)

Then, for my last birthday, my husband had a breakthrough and made a wonderful moist cake. What was the difference? Using vegetable oil instead butter. Naturally my husband, the scientist, made this discovery after doing his research. First: Define the problem. What did I want out of a cake? Light and airy, or soft and moist, but not so dense you could, say, pound in a nail with it? I wanted something moist and rich with a springy crumb. Something that would feel chocolate-y and unctuous on the tongue. And I didn't want it to get dry and crumbly when you put it in the refrigerator for a day.

Once he knew what I wanted, he hit the books, or, to be more precise, a book, Shirley O. Corriher's BakeWiseto uncover the secrets of a moist cake. And voila, he hit pay dirt. Here's what Corriher says about using oil in cakes, "Oil coats flour proteins better than a solid fat and prevents their absorbing liquid from the batter to make gluten. This leaves more moisture in the batter. Cakes made with oil can be not only tender but also very moist."

Aha! So because we were using butter in our cake, we were losing moisture. Furthermore, we were developing gluten, which naturally toughens up a dough (a great feature in bread, not a great quality in cake). Obviously, the taste of butter is incomparable, so we were hesitant to use oil, but then decided to give it a try, realizing that most box cakes we had ever made included oil. Mike tried an oil-based recipe that he found in Tish Boyle's The Cake Book with great results. I've used the same recipe below, with the difference that I replaced the recipe's whole milk with buttermilk. (Why? Well, I have a lot of it, for one thing. Also, the acidity in buttermilk reacts with the baking soda, so I wanted to see what, if any, effect that would have on the final cake. However, because baking powder, which contains its own acid, is also in the recipe, it may not make much of a difference at all. Mostly, my chimp curiosity was to blame.)  

Before I get into the cake recipe, here's another thing I was curious about: the red in red velvet cake. Traditionally, the red in red velvet cake came from a reaction in the cocoa when you added an acid (vinegar or buttermilk), which would bring out the reds in the cocoa. Because I had the cocoa out anyway, I decided to test this. It didn't really work. I was sad. I was hoping for a dramatic transformation. I don't know why nothing happened; it may be the cocoa made now has somewhat different chemical properties than it used to have. Here are some before-and-after pictures (actually I think there's more red in the before picture, but that may have been caused by the light):

Before: A slurry of cocoa powder and water
After: Here I added a couple tablespoons white vinegar. No change. Sigh. 
Now, on to the recipe for the cake.

Devilishly Moist Chocolate Cake
[Adapted from Tish Boyle's The Cake Book]

Ingredients:

  • 1 and 1/3 cups all purpose flour
  • 3/4 cup cocoa (not Dutch process)
  • 1 and 1/4 teaspoons baking powder
  • 1/2 teaspoon baking soda
  • 1/4 teaspoon salt
  • 1 and 2/3 cups granulated sugar
  • 1/3 cup neutral-flavored vegetable oil (such as canola, safflower, etc.)
  • 2 large eggs
  • 1/3 buttermilk (or whole milk)
  • 2 teaspoons vanilla extract
  • 1 cup boiling water
Steps:

Turn on the oven to 325 degrees (Fahrenheit). Butter and flour a nine-inch pan (spring form is nice; it's so much easier to get the cake out).


Mix dry ingredients (flour, cocoa powder, baking powder, baking soda, and salt) into a stand-mixer bowl. Using a paddle attachment on slow speed, gently mix these ingredients until they are evenly distributed. Then add the sugar and do the same thing.


Next, while the mixer is going at slow speed, pour in the oil. Mix for a few minutes until the oil is evenly distributed and the mix sort of looks like crumbly sand.


Now, in another small bowl, whisk the eggs until blended. Add vanilla extract and buttermilk to the eggs and whisk until blended. (Make sure at this point that you've got water boiling. I almost forgot.) With the mixer on low speed, add the egg mixture, stopping the mixer to scrape down the sides of the bowl from time to time. (And don't be afraid to make a mess of your kitchen.)


Now, add a little bit of boiling water at a time, letting the mix get smooth until you add the next bit. Make sure to scrape down the sides. Mix until smooth, but no more. Pour the batter into the pan you've prepared and slide it into the oven. Bake for 45 minutes, then test for doneness by sticking a toothpick into a few center spots in the cake. If they come out clean, take the cake out of the oven. If there are wet crumbs on the toothpick, leave it for as much as 10 more minutes.


Let the cake cool a few minutes in the pan before removing it. Let it cool completely before frosting it.


Dark Chocolate Sour Cream Frosting
[from Tish Boyle's The Cake Book]

Ingredients:

  • 6 oz bittersweet chocolate, chopped or broken into pieces
  • 1/2 cup unsalted butter, softened
  • 1/2 cup sour cream, room temperature
  • 2 and 1/2 cup sifted powdered sugar
  • 1 teaspoon vanilla extract
Directions:

Melt the chocolate by placing it in a heat-safe glass (like a Pyrex measuring cup) in boiling water (make sure that water doesn't boil into the chocolate; it will change the chocolate's texture in undesirable ways). Set it aside to cool until it's comfortable to touch. (This is important, otherwise you'll cook the sour cream and melt the butter, which would result in a kind of icky mess.)


Put the butter into your mixer bowl and beat it with the paddle attachment until it's creamy. Add the sour cream and beat until smooth.


Add a little confectioner's sugar at a time and beat until the mixture is light and creamy. (When you add the sugar, start the mixer on slow and bring up to higher speed. Otherwise you will have an exciting powdered sugar explosion in your kitchen.) Beat in the vanilla extract.


Finally, add the cooled chocolate, a little at a time. Scrape down the sides of the bowl a few times. When you have brought together all the ingredients, beat the frosting for a minute or two so it gets fluffy. Then spread it on your cake. (I am not much of a cake decorator, so I am afraid I can't give you any tips, other than spread a thin layer first to "glue" down the crumbs--also called a crumb layer.)


If you want to make it a layer cake, I have added some pictures below for a handy way to halve your cake evenly (learned this trick from Williams & Sonoma Tools & Techniques). Me? I am going to eat some cake. And then I've got to clean up this mess!


Saturday, November 12, 2011

Chicken braised in sherry and red wine vinegars

One of our best friends, Dave, came over for dinner last night. We ate chicken braised with sherry and red wine vinegars over mashed potatoes (homemade, of course) and a side salad. I'd never made it before. I was riffing off the idea of a coq au vin, but I didn't have any wine on hand, so I replaced the wine with vinegars, stock, and a little cider syrup for sweetness.

I was very happy with the results: tender, fall-off-the-bone chicken with a dark, rich sauce. The tanginess from the vinegar set off the richness of the mashed potatoes to perfection. It was one of those warm, hearty meals that you love to eat on a cold fall day.

Dave was also happy with the results. After a second helping, he announced he envied our future selves because they would get to eat this chicken again. So why not make others envy you and try making this dish?

You will need about half an hour to prep ingredients and then an hour to let it simmer.

Ingredients

  • 4-5 lbs of chicken pieces (bone-in breasts, legs, thighs, wings; if you don't have these, you can cut up a whole chicken into eight pieces)
  • all-purpose flour (about a cup)
  • 2 Tbsp butter
  • 3-4 large shallots, minced
  • 2 Tbsp sherry wine vinegar
  • 1/2 cup red wine vinegar
  • 2 Tbsp tomato paste
  • 2 Tbsp apple cider syrup (if you don't have this, use some maple syrup instead)
  • 1 1/2 cups stock (I used a beef stock, but chicken will be good too)
  • smoked paprika
  • salt and pepper
  • 1 tsp dried thyme
Steps

  1. Rinse the chicken pieces well with cold water and pat them dry with paper towels. 
  2. Sprinkle both sides of the chicken pieces with salt and lots of smoked paprika.
  3. Dredge the seasoned chicken in AP flour. Shake off the excess and set the chicken aside for now.
  4. Melt the butter in a large, deep skillet over medium heat. 
  5. When the butter starts bubbling, add the minced shallots. Cook for four to five minutes until they soften. 
  6. Add the chicken pieces to the pan with the shallots and let the flour on the chicken cook to a nice, dark (but not burnt) crust on all sides (start with the largest pieces so they have a little more time to cook). (You are basically building a roux here.)
  7. Mix the vinegars, stock, tomato paste, apple cider or maple syrup and pour the mixture over the chicken. Scrape the browned bits from the bottom of the pan up into the braising liquid. Stir in the thyme. 
  8. Bring the heat down to low, cover the pan, and let the chicken simmer for an hour. Stir from time to time. 
  9. After an hour, season with salt and pepper to taste and serve over mashed potatoes. Enjoy. And then maybe sneak some seconds a little later. 


Friday, May 13, 2011

Baking our daily bread, step by step


When Mike and I started changing the way we eat, the first thing we did was try to eliminate high-fructose corn syrup and everything that sounded like a chemical mystery ingredient. Doing that obviously meant reading ingredient lists at the grocery store. Turns out, getting rid of unpronounceable chemicals is quite hard. This is especially true for bread. Turn those soft packages with their comforting images of farmsteads, grains waving in the winds, and grandma baking over, and you frequently discover a shockingly long list of ingredients that don't sound like they have any relation with the farm, the soil, and the sun. We must have inspected every package of commercial bread until we found one that wasn't too disagreeable, but the implication was clear: I was going to have to bake our bread from now on.

Now thankfully, I was raised in Sweden by a mother who was a great cook and spent a lot of time with an aunt who was an even better cook, so the notion of baking bread wasn't particularly spooky-scary as it often seems to be here in the United States. Bread baking is a matter of course in Sweden; people often seem to speak of it as an arcane art here (in hushed voices), as much out of the realm of typical activities as blacksmithing. Mostly I was concerned with finding/creating a recipe I liked for a regular daily bread that wasn't too much work (obviously it takes a lot of time for the various rises, but you don't have to do much). And I think I have found it and tweaked it to perfection.

So here's my recipe and instructions for baking our everyday bread. It turns out as a soft, golden-y bread that has a beautiful aroma (especially right after it comes out of the oven and you slather some butter all over it). Another nice thing is that it lasts for at least a week (if it lasts that long at all) without becoming stale or moldy. You can also freeze a loaf to use some other time.

I started with Rose Levy Beranbaum's recipe for basic hearth bread from The Bread Bible, messed around with a few different types of flour and some different combinations of flour until I came up with this recipe, which my family and I really like. (By the way, if you've only got bread flour or all purpose flour, you can still make this bread, and it will be really good.) It makes two generous loaves.

Step 1: Make the dough starter or sponge

In a bowl, combine
  • 1 and 1/4 cup bread flour
  • 1 and 1/4 cup wheat flour
  • 1 bare teaspoon dry active yeast
  • 3 teaspoons honey (this is food for the yeast and doesn't sweeten the bread, although I find that using an orange blossom or raspberry honey can add a very subtle but nice aroma)
  • 2 and 2/3 cups of room temperature water
Beat these ingredients together with a whisk until they are smooth (at least two minutes). You want to get as much air in there as you can. When you are done beating, scrape down the sides of the bowl.   


Step 2: Make the flour mixture

In another bowl, mix together
  • 1 cup oat flour (I am convinced this is what keeps the bread soft and creates such a great aroma)
  • 3/4 cups + 2 tablespoons whole wheat flour
  • 1 and 3/4 cups + 2 tablespoons bread flour
  • 1 teaspoon dry active yeast
Cover your dough starter (sponge) with the dry flour mixture, ensuring that all the wet part is covered. Sprinkle 3 teaspoons (or 1 tablespoon) salt over the top of the dry ingredients. 


Cover the bowl with plastic wrap and set it in a warm place to develop flavor for at least an hour and up to four. The dough starter will bubble up through the flour mixture, and that's OK! 


(You can also let it develop flavor overnight if you like. To do this, let the bowl stand out for at least an hour to make sure the yeast wakes up, then pop it into the refrigerator. When you want to start making the bread, let the bowl sit out at room temperature for an hour before you do anything with it so that it warms up enough to get the yeast going again. I find that if I leave it overnight, it doesn't rise quite as much and isn't quite as soft, but it does taste good.)

Step 3: Mix and knead the dough

(OK, if you don't have a decent stand mixer and a dough hook, this step will be tough. Your arms will get quite the workout.) Assemble your bowl on the stand mixer and attach the dough hook. Start the mixer on low speed and slowly raise your bowl up to the hook (this helps avoid flour flying everywhere). Mix slowly until the flour and the dough starter are completely combined. The dough will be a bit sticky at this point, so let it rest for about 20 minutes to develop gluten and absorb the liquid, and then the dough will be easier to work with.

Next turn the dough out onto a floured board and knead it for 10-15 minutes. 

Ha! As it turns out, you don't have to do this. Apparently the rising action of dough will cause it to knead itself, but I still like to let the machine work it over for another three to four minutes before I set it to rise. And supposedly the amount of time that you spent kneading used to be considered a symbol for how much you love your family, so if you feel like proving that, have at it. I knead about half the time; it depends on how much time I have available and how strong I am feeling. 

Step 4: Let it rise, let it rise, let it rise

After you have mixed together the dough, let it rest for 20 minutes, and kneaded it either by machine or by hand, you'll have a nice dough ball. Oil a bowl, put the dough ball in and turn it over a couple of times to get oil all over it, and cover it with plastic. 

    
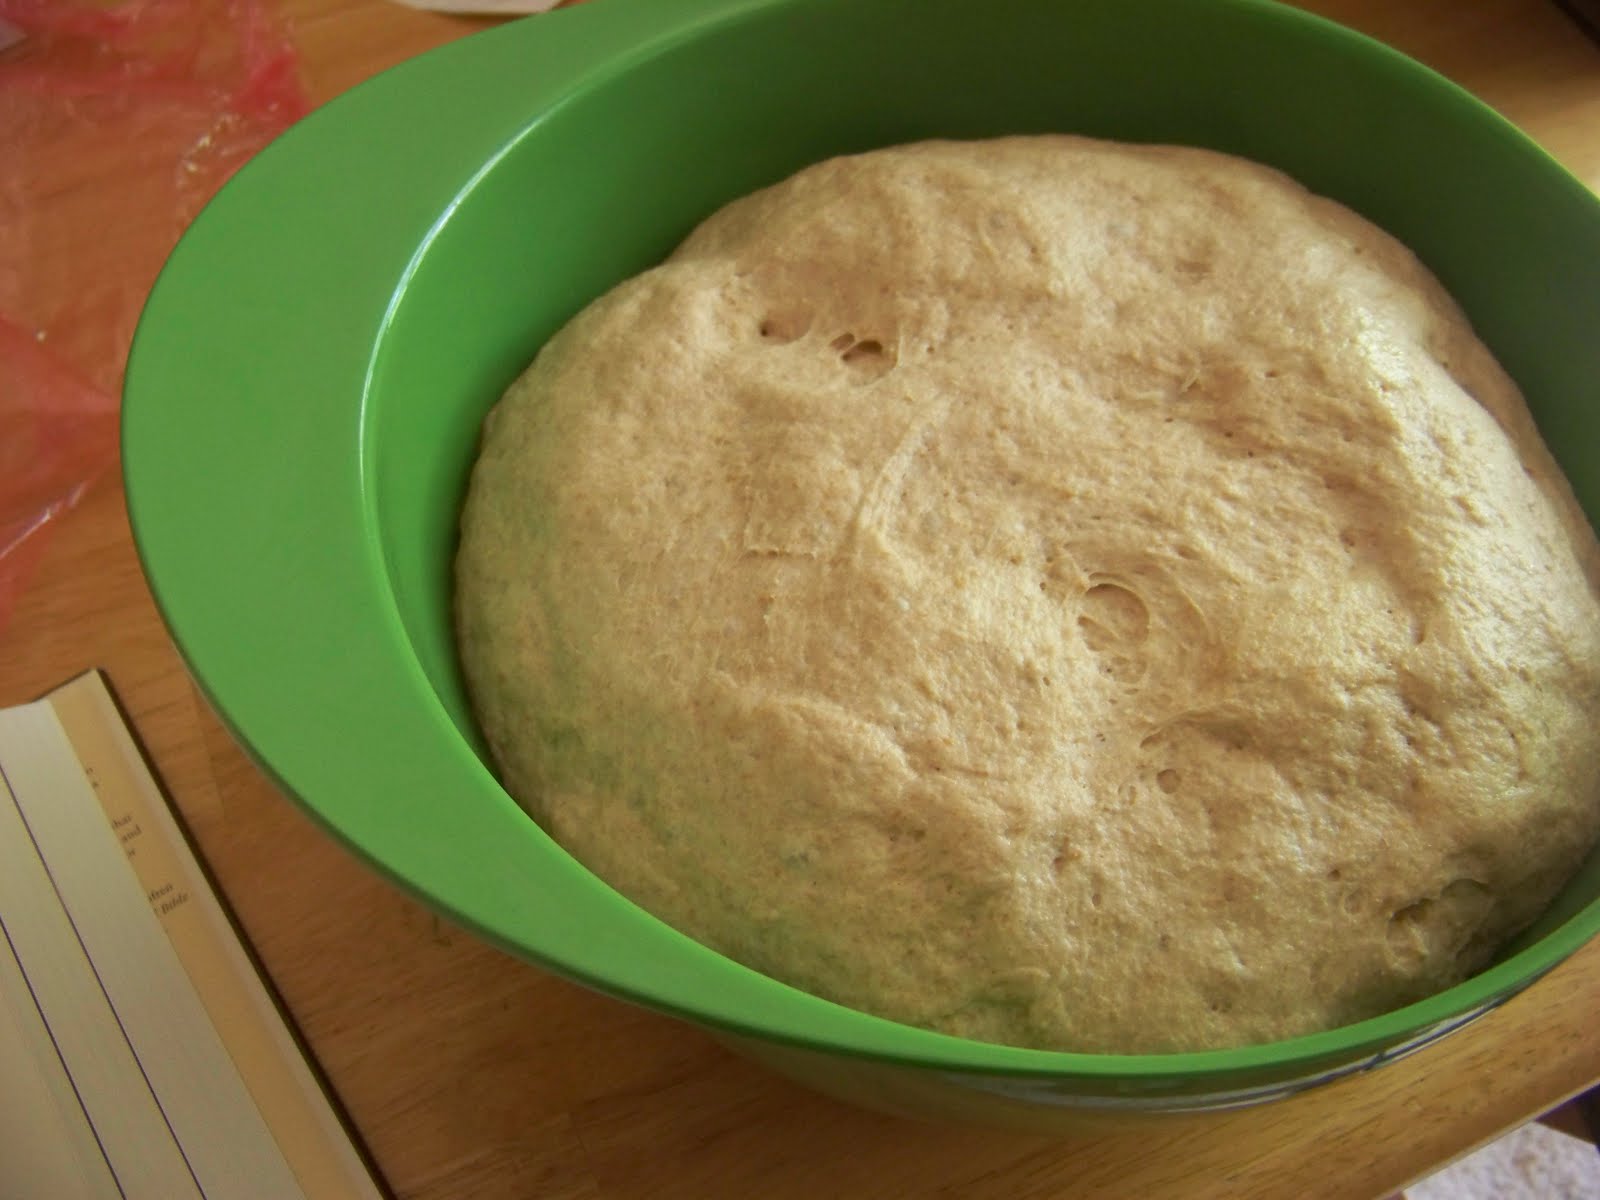
Let it rise in a warm place for about two hours (I find a sunlit window to be a perfect place) until it's about double the size:

Now turn the dough out onto a floured board and flatten it with your hands into kind of a big pancake:


Fold the pancake like you would fold a business letter (three folds). (Beranbaum calls this a "business letter turn.") Then place the seam side down and round in the edges and put it back in the bowl to rise a second time. Once again, let it rise to about twice its original size (the second rise usually takes less time, about 1 hour and 15 minutes). 


Step 5: Shape the loaves and prep the oven
When the dough has risen to twice its size for the second time, it's time to shape the loaves and start prepping the oven. First, turn on your oven to 475 degrees (Fahrenheit). If you happen to have a pizza stone, put it in the oven (that will keep the temperature more consistent). I think you can also use clean bricks. Also put a pan that will hold about two inches of water on the bottom of the oven (just the pan, no water yet).

Then oil your pans (even if they are nonstick). (I use loaf pans that are 23.5 x 13.3 x 6.99 cm. Big loaf pans, basically.) 

Turn your dough out onto your floured board and divide it in half (a dough scraper is kind of genius tool for this, but a big knife will do the trick just fine). Try to make the two halves as even as possible, but I wouldn't worry too much about getting them perfect. 

Then, starting with one ball, flatten and shape the dough into a rectangle.


Fold it like you would a business letter:

Next, roll from the narrow end with the seam on the inside of the roll. Keep stretching it out to the sides until you have a cylinder.

Place the roll into your bread pan with the seam toward the bottom. Do the same thing with the second half of the dough. 


Let the dough rise in the pans until it stands about an inch above the edge of the pan:


Step 6: Bake the bread

When it's time to bake the bread, get about a cup of ice cubes and put them in the pan at the bottom of the oven. (Ha ha, you should hear about the time when I tried doing this with an oven-safe, GLASS pan; It didn't go too well, so don't do that.) Then mist the inside of the oven with a clean spray bottle full of water. Slide the loaves in fast and close the door.

Bake at 475 degree for 10 minutes. 

Reduce the heat to 425 degrees and bake for 20-30 minutes (I usually split the difference and it works well). You will know your bread is done when the edges pull away from the sides of the pan a bit and it sounds hollow when you thump it with your finger.


Step 7: Cool the bread

When the bread is done, take it out of the oven and slide it out of the loaf pans (usually it slides out pretty well, but you may need to go around the edge of the pan with a butter knife). Let the bread cool completely on a baking rack. If it doesn't cool completely before you store it in bags, the steam generated can leave the bread damp and ooky, which will encourage mold.

Now have at it!